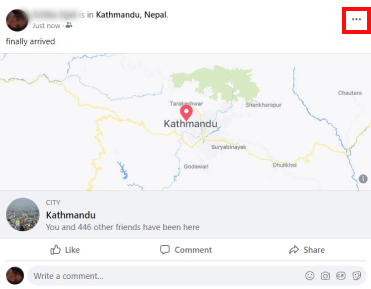
Check in feature is great for people since it lets people post about their exact location. It can serve as an effective way if you want to brag about your holiday adventures with your friends on Facebook. In this article, we will understand the purpose and ways to check in on Facebook.
Why do People Use Check In Feature on Facebook?
People can use check in on Facebook for various different reasons. As it is a form of status update about your current location, it can actually be quite helpful. If your mobile phone has the permission to access your location, you can also check in on Facebook with no trouble. Business can specially flourish, and it is a good marketing technique for promotion. The more people check in on your Hotel/Shops and leave review, it will attract more people. But with advantages comes disadvantages as well. Since check in on Facebook is a public status update make sure your friend list does not have people with ill intentions. Often times, internet is not the safest pace to update about your personal information.
How to Check In on Facebook?
As complicated as it sounds, it is actually quite easy to use the check in feature on Facebook. Even people who are barely starting with Facebook can find the feature right away. We will show you how to check in on Facebook using both web browser and Android/IOS device.
Using Web Browser
You can use web browser on your mobile phone or your PC for these methods. Open Facebook and follow the steps as below:
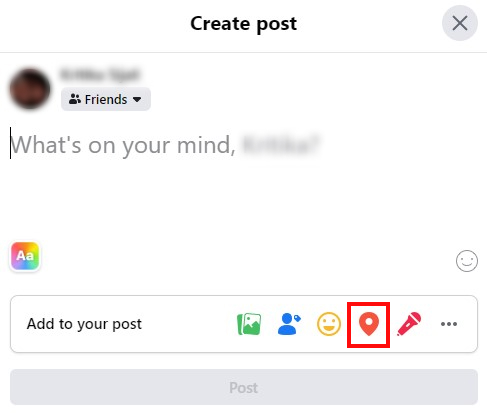
1. Log into your account.
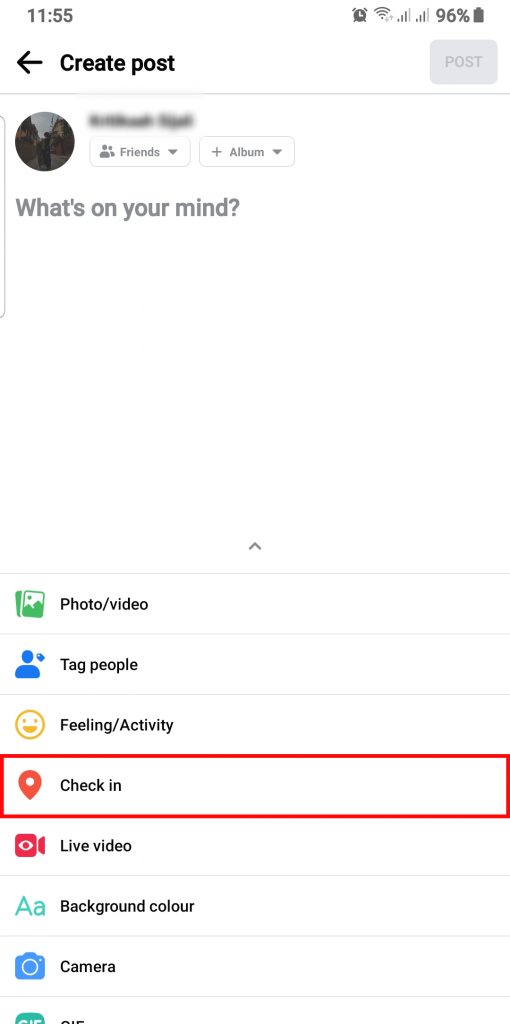
2. Click on ‘What’s on your mind?‘.
3. Tap the check-in icon.
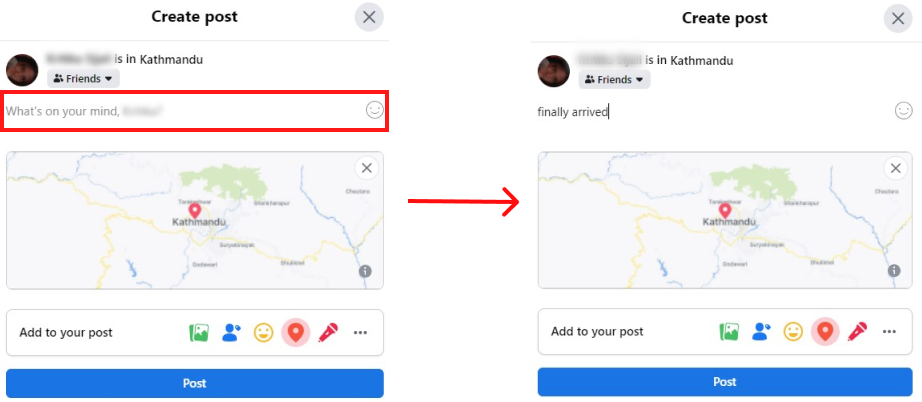
4. Search and select a location.
5. Write something (optional).
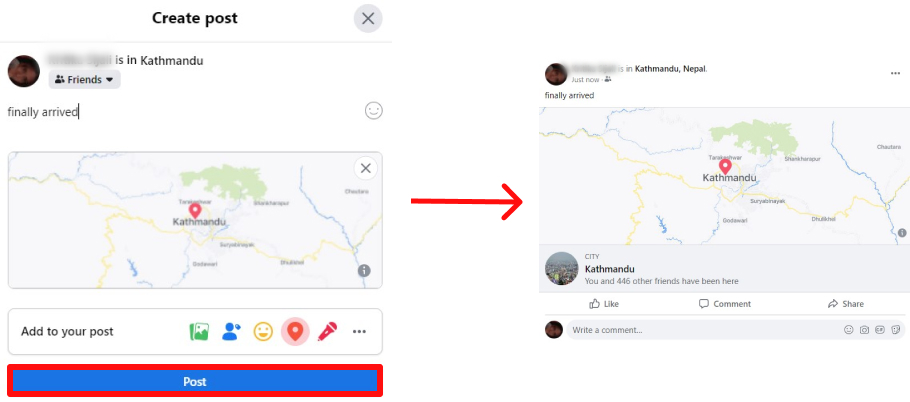
6. Click ‘Post‘.
This way you can use web version on Facebook to check in on Facebook.
Using Android or IOS
Both Android and IOS device can be used for this method. Make sure you have Facebook installed on your mobile and follow the steps below in order:
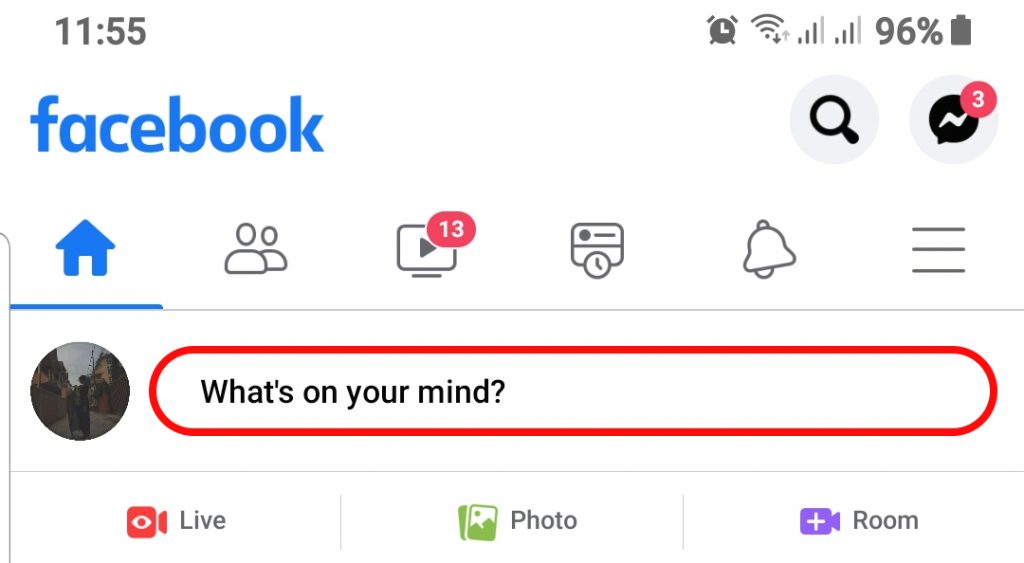
1. Log into your account.
2. Click ‘What’s on your mind?‘
3. Tap ‘Check in‘.
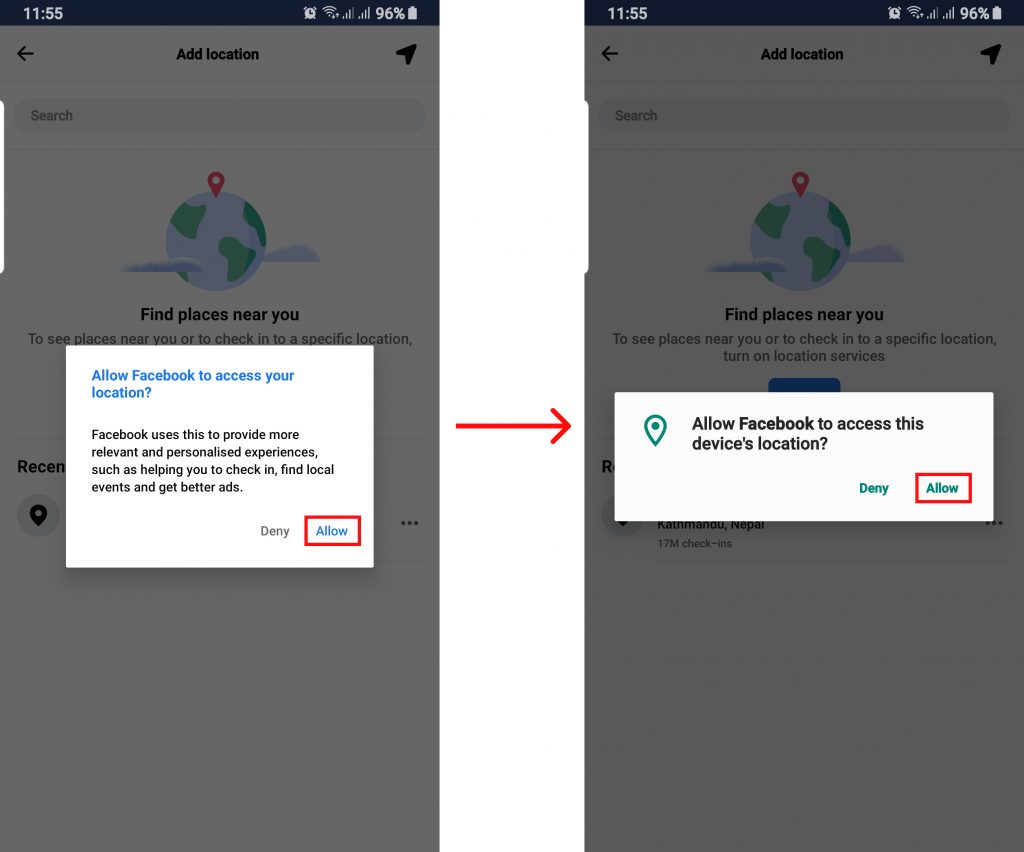
If you have not allowed access on your mobile, you will get pop-up box asking you to grant permission.
4. Click ‘Allow‘ twice.
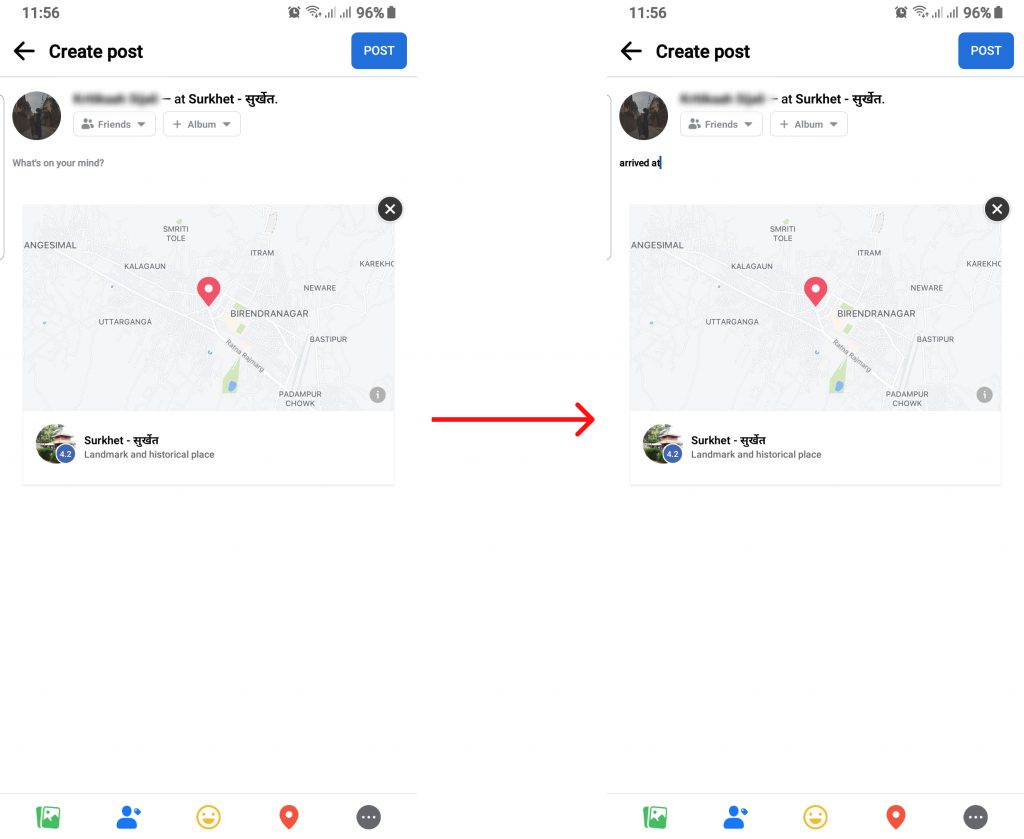
5. Search and Select a Location.
6. Write something (optional).
7. Click ‘Post‘.
This way you can use android and IOS device for check in.
Can you Delete Check In Post on Facebook?
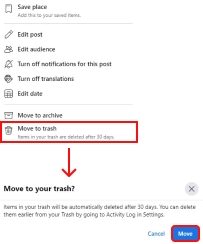
Yes, you can also easily remove a check in post on Facebook. A check in post will appear as a regular post update. So, you can also remove the post with no trouble. For demonstration look at the steps below:
1. Log into your account.
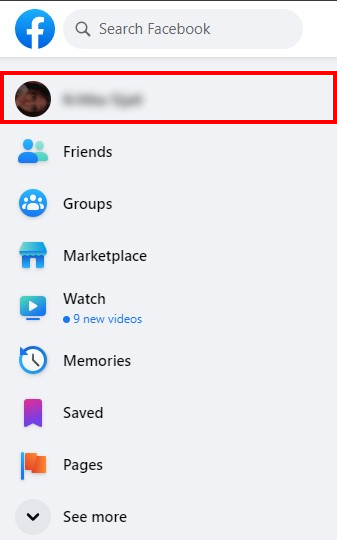
2. Go to your profile.
3. Click on the three-dot icon.
4. Select ‘Move to Trash‘ and click ‘Move‘.
Your check-in post will be moved to trash and will be permanently removed within 30 days.
Conclusion
Check in on Facebook is a public announcement made to let people know about your location. It helps people share their whereabouts with people they are friends with. However, people need to be careful when using check in on Facebook. We hope this was a helpful article. Let us know if you have any queries. Also Read: How to Make a Post Public on Facebook?
Δ